Laundry Room/Pantry Organizing Updates

*This blog post contains affiliate links for your convenience. These are some of my absolute favorite homekeeping products!

If you have been following this blog for a while, you may remember my previous post about our laundry room/pantry organizing project (seen here). After my beloved washing machine broke yet again, we decided it was time to bite the bullet and upgrade our washer and dryer to new, more efficient models. As much as I loved our old top-loader, I did feel a bit guilty with a non-HE washing machine here in this awful California drought. Once the new washer and dryer came in, my old organizing shelf had to go. That prompted a few reorganizing plans. I am so happy now with our ultra-organized space! It is a tiny little multi-purpose room, but it works so well now!One of the first things I updated was our pet food storage, seen in the bottom left corner of the photo below. I ordered one container for cat food, and one for dog food (and labeled each). It works great, especially since they are on wheels and can hold everything from the big huge bags of pet food.

aliciainwonderlandblog

My husband built me this awesome organizing cupboard in the extra space for all of my cleaning/laundry supplies, and our recycle bin and garbage bin. Having those two things behind doors is great with a toddler and dogs. Next to the new cupboard (which he made out of leftover fence boards!), I have my brooms, mop, duster, and rug beater all hanging on this organizer. I also dedicated a spot on the side of the cabinet for the things my husband always seems to be looking for: a clipboard and the lint brushes. Now that they have their own designated spots, that seems to help cut down on a lot of searching and confusion! I got the clipboard and the small white bins on the top shelf at the dollar spot at Target! Every time I go to Target, I always cruise through there to check for any cool organizing supplies, or little wooden toys that would be great for toddler busy bags. It is my favorite part about going to Target. 🙂 Above the cupboard is one of my favorite cleaning devices, my LittleGreen carpet and upholstery cleaner (so easy to use and works really well!).

I labeled all of my small bins with my LetraTag and these labels. I may go overboard labeling everything at times, but it makes such a difference in keeping things organized! On the next shelf, I have my favorite cleaning basics in clear jars, my favorite stain treatment, Nellie’s All-Natural Oxygen Brightener, and a basket for my wool dryer balls. Below that, I have a jar of dog treats, anti-bacterial wipes, and a basket of some of our favorite teas (my husband is more likely to grab a bag of tea instead of a soda if he sees the tea out on display and looking pretty).

aliciainwonderlandblogaliciainwonderlandblogaliciainwonderlandblog

Inside the cabinet, there is a shelf above the trash/recycling cans where I store more cleaning supplies and refills, including my microfiber cloths for my Swiffer mop! I found the two cute WASH containers on clearance at TJ Maxx, and the turquoise bin was from the dollar spot at Target! In the binder, I keep all of my housekeeping and gardening checklists, and a collection of magazine articles with fun family ideas in Southern California, for great weekend day trips.
aliciainwonderlandblog.com
Next to the new cupboard, I ordered an over the door shoe organizer to organize all of my cleaning products (a great Pinterest-inspired idea that I’ve been meaning to do for a while!). I also ordered some fresh cleaning cloths since our old ones were starting to fall apart. Amazon Prime is so amazing…you can find just about anything on there for a great price!
aliciainwonderlandblog

On the inside of the other door, I got a multi-hook over the door hanger on clearance at Ross, that works great for hanging my herbs to dry, and I also use this spot to hang our calendar.aliciainwonderlandblog
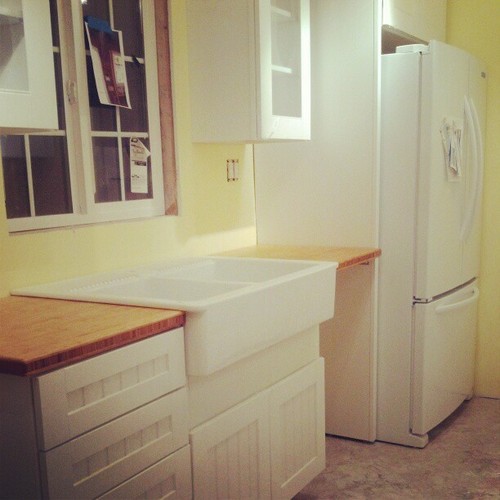
The shelf that used to be in the laundry room got moved just outside it, into the kitchen for a bit of extra storage. I put a lot of work into decorating that shelf, so I made sure we were still going to use it! 🙂
aliciainwonderlandblog

Originally, my husband planned to install doors over the pantry cupboards. Then we got busy with more urgent projects, and I realized that as we added a few more things in here, it would be a bit too crowded with doors. So I just covered up the ugly central heating unit with a burlap curtain. Next to that, I have our ironing board (nice because it is extra wide), and hanging organizer. I made two spray bottles that I spruced up with this contact paper, one for plain water, and one with a vinegar/water mixture (a great, natural wrinkle remover). I have one bottle from Home Depot and one from Lowe’s. The one from Home Depot wins, hands down. The one from Lowe’s barely works already.aliciainwonderlandblog

On the other side of the heater cabinet, I have my vintage washboards hung for easy access if needed for spot cleaning (and just decor too).
aliciainwonderlandblog

On the side of the dryer, I used some magnetic clips to hang up some of my frequently used cleaning/gardening lists and stain treatment chart. I got the magnetic clips at the dollar spot at Target (pretty sure they still have some of these available). The strange looking magnet is a recycled magnet from a hard drive that my husband had since the dollar spot magnets were not strong enough to hold up multiple laminated sheets (I laminate all of my checklists that I use often using this laminator and these sheets).
aliciainwonderlandblog

Below our Ikea fold-down table (which is never really folded down), I have our triple sorting laundry hamper. I have chalkboard signs on there for hand-wash, lights and darks (another Target dollar spot find!). Next to that (on the left) is our rolling laundry basket. This is one of my favorite things because it helps me roll the clean laundry out of the laundry room when I want to fold it all elsewhere (usually in the living room so I can watch TV while I fold). Great for days when my back hurts, or when I have had medical restrictions about lifting anything heavy. Originally, I had purchased a similar laundry basket elsewhere, and it broke within the first couple of days. This one has been amazing, and is really heavy duty.
aliciainwonderlandblog
Previously, I had our lone socks hanging on a piece of twine, but I upgraded them to this cute little display with an antique washboard. One important thing to note…hot glue did not keep the clothespins on the washboard, but super glue did the trick.
aliciainwonderlandblog
Still love our pull-out pantry drawers!
aliciainwonderlandblog
My husband is notoriously bad about remembering to bring reusable bags with him to the grocery story when he makes a quick run. Even if I had him some before he leaves, somehow he still forgets them, so we end up saving a lot of paper bags. 🙂 Thankfully, I always end up needing them in the compost bin or for kindling, etc. I gather them all up and store them in this “wasted” space, in front of the electrical panel (such an annoying location for that panel). I also keep our vacuum and attachments stored here.aliciainwonderlandblog
I have a piece of twine nailed to the wall that I use as a tiny indoor clothesline. Perfect for air-drying cloth diaper shells! Below that, between the Ikea table and the washer/dryer, I have our clothes drying rack. I have gone through many poorly made clothes drying racks in my life, and this one is so well made and holds so much!
aliciainwonderlandblog

Previously, I had some plain burlap curtains that were actually from the laundry room at our old house. At our old house, that window was on the back door, and somehow the curtains got really dirty after we had a party one night. Burlap is really difficult to wash, so it was time for an update. I actually got these adorable vintage potato sacks for free via Craigslist, and turned them into our new curtains! They are even from a farm in our home state of California. 🙂
aliciainwonderlandblogBY0A7943-copy
Below the window, I hung these three little metal buckets for tossing in miscellaneous odds and ends that turn up with the laundry, such as coins, lint (I save lint for the compost bins), etc. I actually got this great idea from ABowlFullofLemons.net! I made homemade chalkboard labels for those buckets (instructions here). I originally hung those buckets up with 3M damage free hooks, but I soon realized that those hooks work fine in our entry room with the eggshell finish paint, but they do not work at all in our kitchen or laundry room, where we have semi-gloss paint on the walls. So I replaced those hooks in the laundry room with some standard, screw-in hooks.
aliciainwonderlandblog

Our Favorite Hybrid Diapering System: Gdiapers

When I was pregnant, I started looking into various cloth diaper brands. It saddens me to read how many regular diapers go into landfills each year, and my husband and I just could not stand the thought of being a contributor to that problem. I was a little overwhelmed by all of the different options out there and wasn’t sure how the whole concept would work for us. All of the babies that I used to babysit used only disposables, so cloth diapering was totally new to me. When my dad said that he would not do cloth diapers if my parents were babysitting E, I started looking into a hybrid diaper system. I discovered Gdiapers, and am so pleased with how they have been working for us.

We initially started with the Gdiapers newborn bundle, and I figured we would see how things went with that and one package of the cloth inserts before we invested too much more in the whole system. My initial plan was to start off using the biodegradable inserts and the cloth inserts once we returned home from the hospital and see what worked best for us. When we returned home from the hospital and I could not walk for a while without my crutches, we decided to just buy a couple of packages of regular disposable diapers like we had been given in the hospital for the time being, putting off the cloth diapers for later.  One night when we realized we were down to our last few disposable diapers, and all of the grocery stores were closed, I told my husband that we were going to start using the Gdiapers instead, despite everything else that was going on. I love the freedom that cloth diapers provide…no panicking when you are running low on diapers and the stores are closed. All you have to do is start a load of laundry and you are all set.

We quickly realized that we much preferred the Gdiapers over the regular disposable diapers anyway. The disposables we were using were leaking everywhere and just did not seem to hold enough. They were also starting to irritate his skin, despite being from a “natural” line of diapers. The newborn diaper shells are a little different than the ones shown below; the snap in liner is sewn into the diaper shell. Our baby quickly outgrew those and moved into the size small, shown below.

When I was researching Gdiapers online, it all seemed a little confusing to me at first. It seemed like there were a lot of things we would need to purchase to use the system. I decided to put together a step-by-step breakdown of how we use them, hopefully helping anyone else considering trying out cloth diapering.

Below: The various components we use. You don’t have to go with cloth and biodegradable inserts. You could use one or the other, but I like having both as an option for different times. We use the biodegradable inserts when we are out running errands since they absorb more, are less bulky in the diaper bag, and can be thrown away in a trash can. We also use the biodegradable inserts before bedtime at night since they hold more and we don’t wake up with the baby in a puddle of wetness. We use the cloth inserts the rest of the time, with a paper liner over it. The paper liner catches any poop so it is easily discarded, and makes washing the cloth inserts easier. To use the paper liner, you stuff in a cloth insert first, and then put in the paper liner over it.

1

2

3

4

With wet diapers, the snap-in liner can usually be reused for another round. For poopy diapers, the snap-in liner is usually best removed and replaced with a clean one. They come out very easily as seen below. Bonus…After you take out the paper liner or biodegradable insert, removing the snap-in liner like this keeps you from having to deal with touching any more of the mess.
5

The dirty, reusable parts of the diaper are tossed in the dirty bag. The paper liners and the biodegradable inserts are tossed in the diaper bin. When it is time to wash diapers, I just empty the bag into the washing machine, and toss in the bag, eliminating the need to touch the dirty diapers again. We also have a travel bag for dirty parts that is kept in the diaper bag, shown here.

6

Diaper shells that are damp but not dirty are hung up to dry between uses.
7

One other important thing: the diaper shells must always be put on so that the “g” is facing the back. 🙂

8

I end up doing laundry about every 2-3 days, which is not so bad. This is the list of supplies that seems to work best for us: 6 cloth shells, 18 snap-in liners, 24 cloth inserts, a box of the paper liners, a dirty laundry bag, and a smaller travel wet bag.

Hallway Makeover

I actually finished the makeover on this hallway a while back, but since I hadn’t unpacked the curtain rod that I wanted to use with the curtains, I hadn’t blogged the transformation yet. You can see the before pictures here. This is the hallway that leads from our entry room into my office and studio area. I use the vintage trunks and suitcases to store photo props and blankets. I added some of our favorite photos and some touches from our wedding decor to personalize the small little space, including our floral monogram banner that I made. The hallway is also most likely going to end up being where we keep the baby’s stroller. 🙂

Alicia in Wonderland Blog - Hallway Makeover Alicia in Wonderland Blog - Hallway Makeover Alicia in Wonderland Blog - Hallway Makeover Alicia in Wonderland Blog - Hallway Makeover Alicia in Wonderland Blog - Hallway Makeover

My Eco-Friendly Cleaning Guide

I am slightly obsessed with keeping our house clean, organized, and as healthy and toxin free as possible. The past several months were very difficult since I was on bed rest and not allowed to do any cleaning (you can read more about my pregnancy journey here). My husband cleaned as much as he had time for, but since his time is so limited (and he doesn’t know my normal routine), our house was never as clean as I usually keep it. We considered hiring a cleaning service, but things were in too much of a state of unpacked chaos, with a bunch of half finished projects all over the house.

Since I have been off bed rest, I have made it my main goal to get this place unpacked, cleaned and organized. We bought the house just a short time before I got pregnant, and then all the pregnancy complications brought much of the unpacking and organizing to a complete standstill. It has been just under two weeks, but we have finally been able to get pretty much everything unpacked, and I went on a crazy organizing spree. I also did a thorough seasonal deep cleaning of the entire house. It took me much longer than normal since I am just slowly regaining my strength, but it feels so nice to have a clean, organized house again! It has not felt like this at all the entire time we have lived in this house.

One of my favorite resources to make sure I do a thorough cleaning job on a regular basis is Martha Stewart’s collection of cleaning checklists. I have them all printed out and in sheet protectors in the floral binder shown above. I used to have the daily checklist posted on the fridge, but by now I have it memorized and it is part of my regular routine. The weekly cleaning checklist is great, as are the monthly and seasonal lists. I actually put in my weekly, monthly, and seasonal cleaning days in my organizer app (we use Cozi), scheduled to repeat regularly, so I never forget which list to use and when. Since I have really bad dust allergies, I usually add in another mid-week mini cleaning or two, to try to keep the dust at a minimum. That also helps with the crazy amount of pet hair that our family tends to generate. 🙂 You can find all of Martha’s cleaning checklists here. I also recently found a daily cleaning checklist that I love on A Bowl Full of Lemons (available here). This one is definitely going on the fridge and becoming part of my new routine! So far, it is really helping me keep things maintained and clean!

Many women get a strong nesting instinct while pregnant, and want to get their house really clean before the baby arrives. Since I have been doing so much cleaning lately, a number of people have asked me if that is from my nesting mode kicking in. I don’t think the baby is coming in the next couple of days, but I am just so happy to be able to catch up on my normal routines! I am a strong believer that your house is not actually clean if all you are doing is replacing the dirt with a bunch of toxic chemicals. I don’t use any “traditional” cleaning products in my house, and I can guarantee you that on a regular basis, our house is just as clean or cleaner than any house you can find that is cleaned with the “strong” cleaning products. I do not use products with bleach, ammonia, or other harsh ingredients for the safety of the environment and our own health.

When I was a kid, I started using Simple Green to do the cleaning for my chores since I was a very environmentally concerned kid. While I still use Simple Green on occasion for really deep cleaning jobs, the scent is honestly not my favorite. These days, I vary between using homemade natural cleansers and store bought natural cleansers. If I have the time, I love referencing the cleaning recipes detailed in the book shown above, Lemons & Lavender. I make good regular use out of homemade lavender oil, lemon juice, vinegar, and baking soda. Other times, I love using the products from Method. I seriously love the way they smell. 🙂 They have a wide range of products for a variety of needs. My favorite is the cucumber all purpose cleaner. I use that for almost everything. I also love the fact that they have naturally disinfecting products for the kitchen and bath…no harsh chemicals needed to sanitize things!

Also in my cleaning caddy is Bon Ami. I love this for scouring the sink, showers, really dirty pots and pans, etc. It has been around forever, is super cheap, and non-toxic. I always save the mesh bags from potatoes, garlic, and other produce since these make great (and free!) scouring pads. You can see my little stash in the caddy above (the red thing is a bundle of mesh bags).

If a particular pot or pan is dirty beyond the scrubbing point, and the Bon Ami is just not enough to get off some kind of burnt, caked in mess, I put a mixture of water, baking soda, and vinegar in the pot and boil it over low heat. This always gets the impossible to clean tough stains off my stainless steal cookware. It may take a little scrubbing after boiling for a while, but this method has never failed me. I never use anything that may scratch the surface of the pots and pans to get them clean (no scouring pads, etc.).

Instead of cleaning with paper towels, I keep stacks of rags on hand for dirty tasks. I also keep a microfiber cloth on hand for mirrors and windows. If I still have streaks after that, I use the tried and true method of a crumpled piece of newspaper to get rid of any remaining streaks.

My two favorite sponges are a Mr. Clean Magic Eraser (great for so much!) and the Scotch-Brite Greener Clean Sponges. These are also great to use in place of paper towels as well since they are absorbent! Once a week, I wet all of my sponges and heat them in the microwave for 30 seconds to kill any lingering germs.

For dusting, I love using the pink microfiber mitt shown above. It fits on your hand like a big mitten, and makes it really easy to dust surfaces. I am very short though, and that limits my range of what I can reach easily. As a solution, I attached the mitt to an old Swiffer stick with a rubber band. I love the ease of use of using a Swiffer, but feel so wasteful using them since they have to be thrown out so often. For me, this is the perfect solution!

With so many pets shedding so much fur all the time, keeping our floors clean is a big task. I start by sweeping each room with a regular broom and dustpan to get rid of the dirt, pieces of cat litter, and whatever else has been tracked all over the house. Even though the floors may look clean at that point, I have come to realize that we still always seem to have even more pet hair lingering after that point. I then use the Mr. Clean microfiber dust broom shown above, which picks up the rest of the pet hair and any lingering dust bunnies. I am seriously obsessed with this dust broom/mop combo. It is one of the best things I have ever found. One side has a dust broom, and the other has a mop attachment. When I finish with the dust broom side, I go through and use the mop side. Since the mop is made out of detachable fabric, I love that I can take it off and give it a really good rinse in between each room. When I finish with the whole house, I can take off both attachments and throw them in the washing machine with all of my dirty rags and towels. It is so easy and so efficient!

The caddy shown above is my whole house caddy. I also have a second container of bathroom cleaning products that I keep under the bathroom sink in our master bath. One of my favorites for the bathroom is the Method Daily Shower Spray. We give a quick spray every day after our showers, and it helps keep the grime down between cleanings.

I hope my guide has inspired you to consider using some healthier, more environmentally friendly ways to keep your house clean! I am not going to go into detail about why the traditional cleaners are horrible…there are plenty of other resources online and in books about why those cleaners are bad for the environment and your health. None of the products or references listed above have requested to be listed or provided sponsorship…these are just my honest tips about what I have found to work best for me! 🙂

Kitchen Remodel

Our plans for this kitchen have changed so many times in the past 7 months.  We originally wanted to keep as much of the kitchen intact as possible to reduce the amount of waste that we would be contributing to a landfill.  Home improvement shows always talk about kitchen remodels with “eco-friendly materials”, but no one ever addresses how much landfill waste is generated with each remodel.  We planned to keep as much of the existing kitchen as possible and make it work for us.

Plan A was to clean and repaint the existing cabinets, update them with some new hardware, and replace the existing cheap, chipped laminate countertops with new bamboo countertops.  We also planned to keep the existing floor tiles since they seemed to be in decent shape and we kind of liked them.  We soon realized that using the existing cabinets would not really be possible since they were falling apart, and they were dirty beyond the point where any reasonable amount of cleaning would help the situation.  Some of the pieces were even missing, and that plan got thrown out pretty quickly.

tumblr_m230buEVsf1qh2ttzo1_500

Plan B involved removing the existing cabinets and quickly replacing them with some cabinets salvaged from my aunt & uncle’s recent kitchen remodel.  The cabinets were only a couple of years old, so we figured that would be a great low-cost and environmentally friendly option (saving their old cabinets from the landfill, yay!).  We planned to get the cabinets in and set up, and then repaint them after they were installed (in the interest in saving time and work space).  We were still planning to use the bamboo countertops, so we went ahead and ordered them, thinking it would take a while for them to be delivered (it did not – they came way faster than we expected).

Once the original cabinets in our house were removed, we quickly realized that replacing them would not be as simple as we had thought.  There were holes in the wall, areas of missing drywall, no exterior insulation, and many other problems.  My husband then had to make the decision to tear out all of the walls and fix all of the problems before putting the cabinets in place.  That was the longest part of our kitchen remodel, which got stretched out over many months with him being gone out of town quite a bit of that time (for work and with prepping our Texas house for sale).

tumblr_m2ygeu6tbV1qh2ttzo1_500

Here he replaced the window, and found a very clever way to repurpose some found materials.

tumblr_m3miv96KS81qh2ttzo1_500

It turned out that there were actually three layers of wall that needed to be removed.  Once the walls were finished, we now had a huge gap of space where the existing tiles did not cover the floor all around the kitchen.  There were also spots under the old cabinets where there were no tiles at all.  As much as we didn’t want to rip out the old tiles, we felt we were left with no choice.  My husband ripped out the old ceramic tiles and began replacing them with the new marble tiles that we picked out.

tumblr_marsrnJ8NL1qh2ttzo1_500

tumblr_mcd46dlBHn1qh2ttzo1_r2_500

We planned to set aside the usable cabinets that were originally from our kitchen and save them for when my husband builds us a garage (originally high on the priority list).  However, we have had to adjust the priorities around here quite a bit lately and the garage project has unfortunately gotten demoted to the bottom of the priority list with the new baby on the way.  We may end up donating those cabinets since it is driving us nuts to have cabinets sitting around in the yard and patio.

At this point, my husband started seriously evaluating our plan to repurpose my aunt & uncle’s old cabinets.  His original plan for those cabinets involved cutting apart and rebuilding many of them to get them to meet the sizes we would need.  We would also need some additional cabinets to fill in some areas where we had nothing that would work.  Before we started any of the kitchen remodeling, we picked out and ordered our appliances, countertops, and our farmhouse style kitchen sink, all of which have been sitting around in various rooms of our house, still in boxes.  The salvaged cabinets would not fit the microwave vent combo or the farmhouse sink, and would need some major modifications.

Life with a pregnant woman with multiple food allergies and no kitchen in our home has not been easy for my husband.  This kitchen remodel dragged on way more than either of us ever expected.  We also did not expect that I would be pregnant in the middle of the whole thing.  Given all the things on his plate currently (work, a year+ long intensive training program for his work which involved a lot of traveling, fixing up & trying to sell that house in Texas, etc.), he was afraid that it would take him another number of months to get those salvaged cabinets functional for our needs.  As much as we weren’t looking forward to another huge expense at this moment, we decided the best option was to move onto Plan C.

Plan C meant donating those salvaged cabinets and ordering new ones.  It all actually started when I was at Home Depot looking for more paint swatches, saw a Martha Stewart Kitchens catalog and brought it home for organizing ideas.  I kept telling him how nice it was that they gave away such a beautiful catalog for free. 🙂  Next thing we know, I am obsessed with a particular style in the catalog and we are in the store ordering all new cabinets.  They said the cabinets would take a minimum of five weeks to be ready, but (surprise!) we got a call that they were ready for delivery way earlier than we expected (so they had to sit in our living room for a while).

tumblr_mcvxx3DBHz1qh2ttzo1_500

The cabinets being ready early was both good news and bad news.  The flooring was not finished yet, and we had not had a chance to donate the two sets of cabinets that have been cluttering up all of our spare rooms, side yard, patio and trailer.

Originally, I was planning to stencil the accent wall in the kitchen with a large scale stencil that I ordered.  However, I have been having some problems with my pregnancy, including a trip to the emergency room due to way too early contractions.  I have been put on bed rest for the time being and have not been able to work on any of the projects with the house that I had planned for the past few weeks.  The kitchen walls will just have to be solid yellow until I am feeling a little better.  I also have not been able to work on the gardening at all, which unfortunately means all of my second season veggie garden plans have been postponed for the time being. 😦

Here is a quick preview of all of the progress my husband has made on the kitchen lately…almost functional!
tumblr_mdntdrhEsa1qh2ttzo1_500

Easy Green Smoothie Recipe

Super easy recipe for my favorite green veggie juice!  All you need is:

-1 banana
-2 cups mixed leafy greens (I used a mix of spinach, kale & arugula since that is what I have tons of in my garden)
-juice from 2 oranges

Just throw everything in a blender until liquified, then chill & enjoy!

tumblr_m4y45iYmDA1qh2ttzo1_500