A Thousand Words a Picture Does NOT Tell ;)

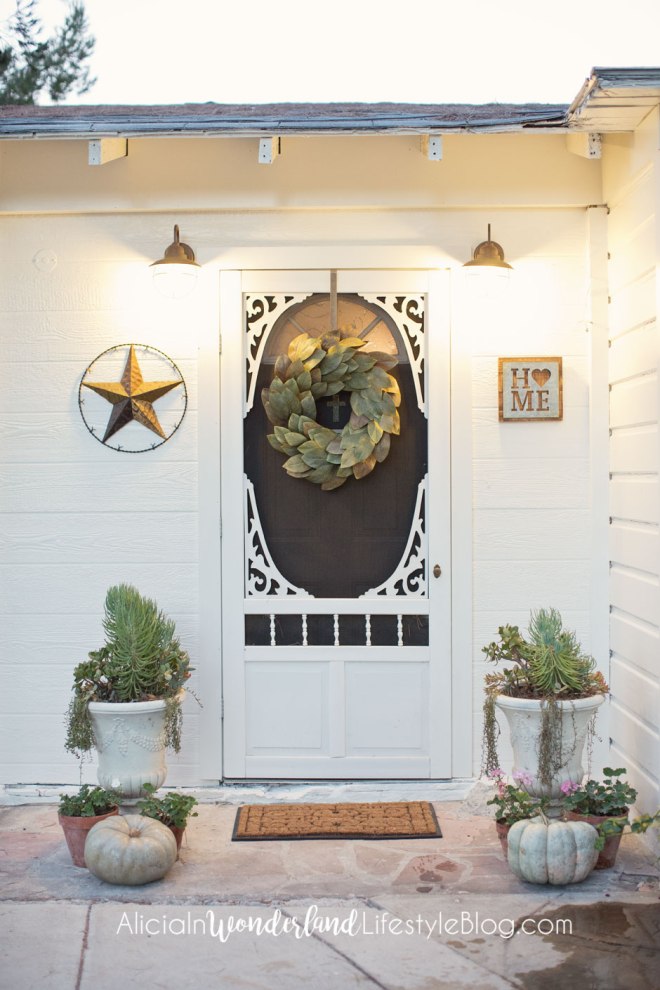
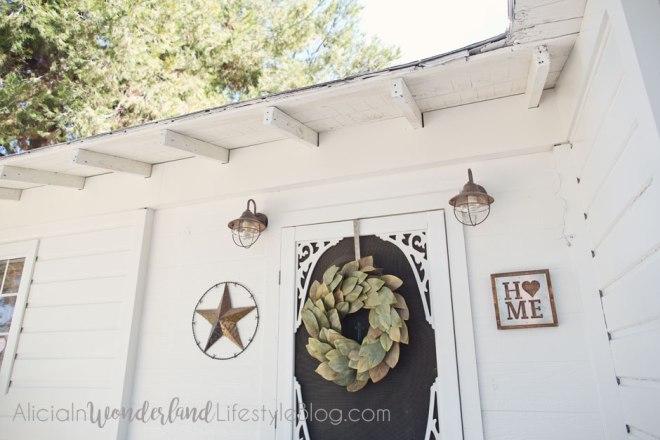
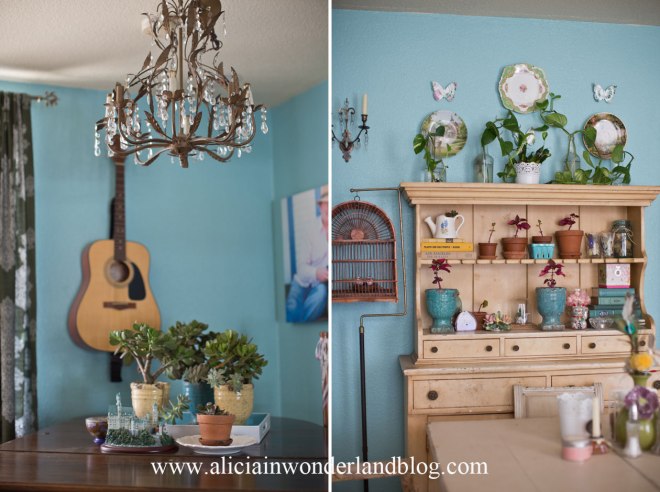
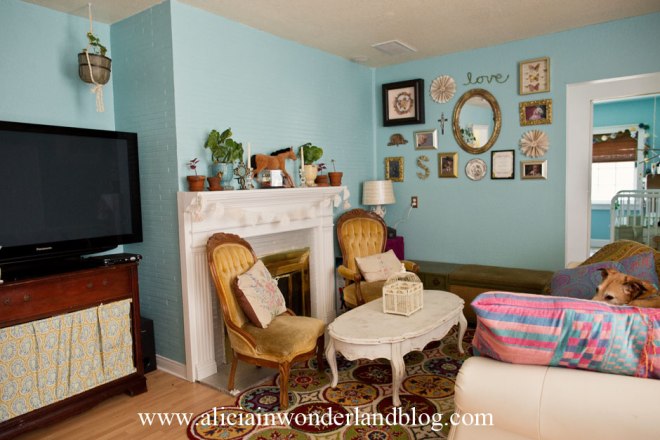
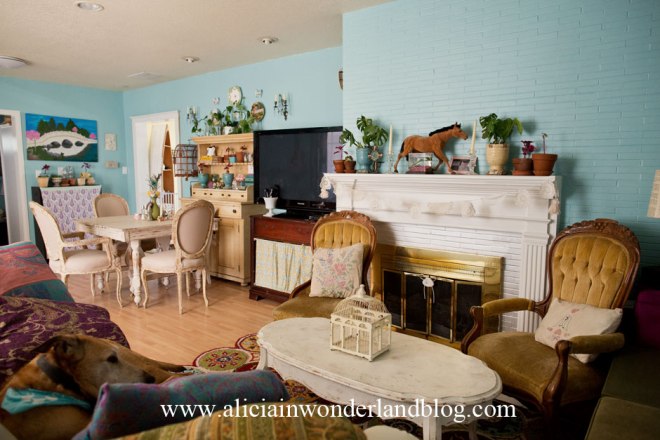
A couple of weeks ago, my husband and I thought it would be hilarious to dress up as Chip & Joanna Gaines for Halloween. I wanted to get a picture of us in front of our shiplap covered fireplace and floating shelf mantle that we worked very hard to create, very Fixer Upper style. 🙂 From an outside perspective, it looked like everything was picture perfect. In reality, I just did a really good job of framing the photo to exclude all of the chaos surrounding us. 🙂 Want to know the real behind the scenes story? It has been so crazy here lately that even my mom called after she saw the photo and asked how we pulled that photo off (since really only very few people know the reality around here lol).

14900433_1382713551740464_5838969799296411849_n

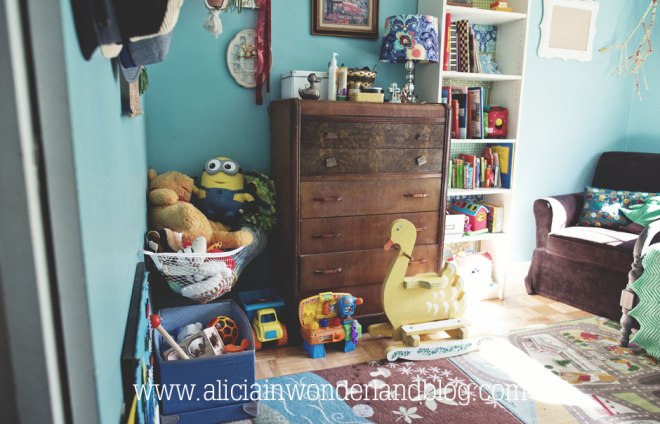
For most of October, our boys traded off being sick, reaching a peak in late October when Baby F came down with an ear infection in both ears, and roseola…fever spiking at nearly 105 degrees. It was beyond stressful. The boys were getting stir crazy and the house was a chaotic mess from them being stuck inside for so long. Of course it all played out when I am in the midst of the busiest time of year for photographers, when I am already stressed to the max.

We “finished” up our renovation projects on my home based studio/office during my maternity leave a few months ago (I say finished in quotes because I always seem to come up with some new crazy project idea for my poor husband). Now we are trying to focus on finishing up our crazy projects on our actual house with the little free time that we have. Things have been a chaotic mess as a result. Walls have come down, flooring is temporarily filled in with patches of awful concrete, etc. We keep trying to make plans with friends, family and neighbors but things keep coming up in the chaos and we feel like we’ve had several months of antisocial behavior as a result lol.

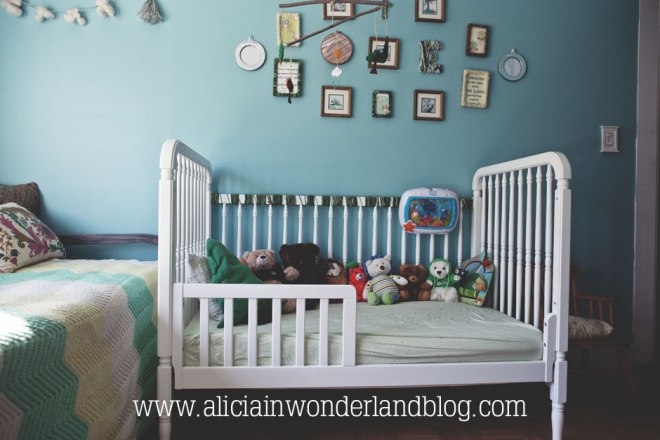
Previously, we had a bed in our master bedroom that we made. My husband made the bed frame, and I made the padded headboard. It seemed great in theory, until slimy toddler hands kept jumping up onto our bed and destroying my pretty satin headboard. So that looked nice for literally about a day! My husband asked me to visualize my dream bedroom and tell him what that included. I said that I have always wanted an antique white armoire and a pretty black antique style wrought iron bed frame. Literally since junior high, that is what I have been hoping to have some day. So I started searching online to find those two items. I found an amazing white armoire that I love (and happens to look really cute with the vanity I already had!), and found an adorable bed frame on sale from Target, and a beautiful white quilt from Overstock.com. I was so excited…my dream bedroom should be arriving any day via UPS! 🙂 Then reality hit…..

The bed frame arrived severely banged up and damaged. The bedspread arrived in a defective size, definitely not proper king size bed measurements. I spent over four hours on the phone trying to resolve both of the issues. We ended up with a damaged bed frame in a box sitting in the middle of our living room for a few weeks while we sorted out all of the details of the mess. The big huge box was in front of our fireplace, and was driving me nuts. My mom saw the picture of us in front of the fireplace and was so confused…she immediate called and asked what happened to the big huge box and all of the mess around it lol. We literally shoved it out of the way just for the picture!

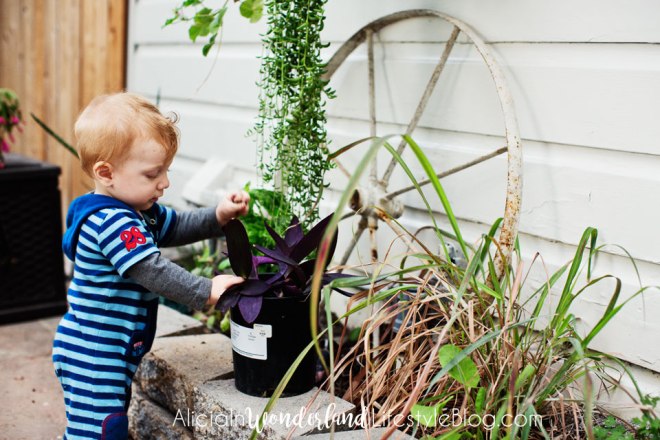
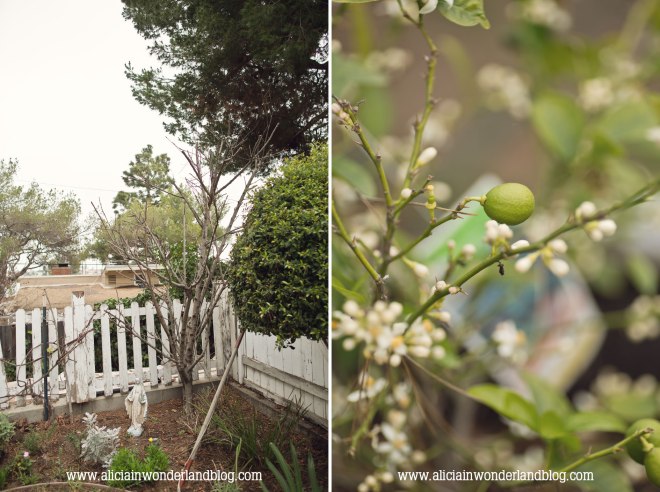
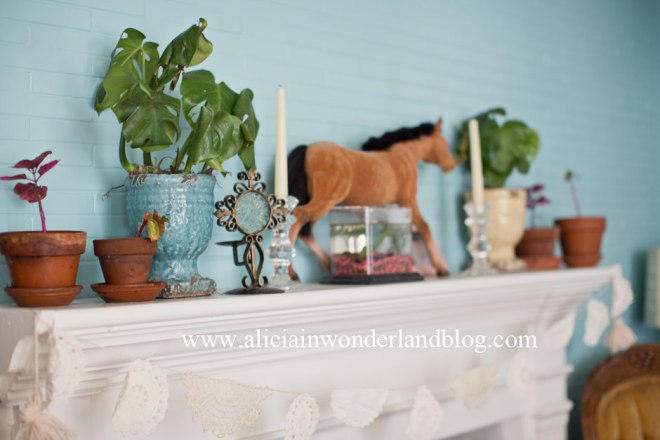
While the baby’s fever broke by Halloween, the boys were still feeling a bit under the weather and not up for a whole lot. They were being particularly crazy while I had my tripod set up for the photo above. 🙂 I realized I had been working so much lately that I forgot to do laundry, and our 3 year old son E was out of clean clothes, particularly clean underwear lol. He was running around in circles while I had the tripod set up, yelling “no underwear today, woo hoo!!” Baby F is my little gardening helper (I call him Mr Green Thumb because he jumps out of bed every day, excited to come garden with me in the morning, and loves pinching/harassing all of my plants). 🙂 Since F had been sick and it had been a bit cool and rainy, he hadn’t been allowed to come outside and garden for a bit. He was trying to escape out the door into the garden while we had the tripod set up lol.

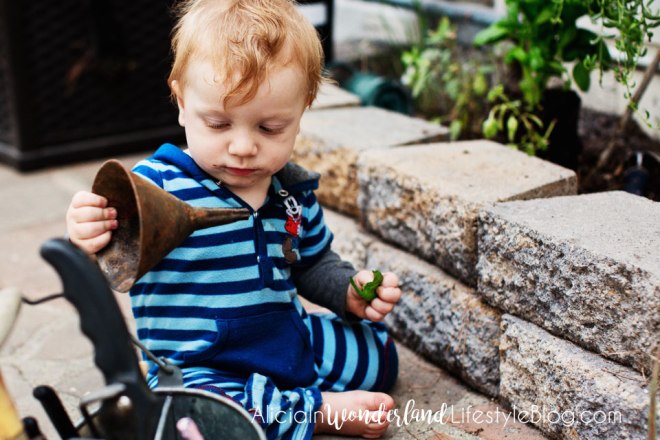
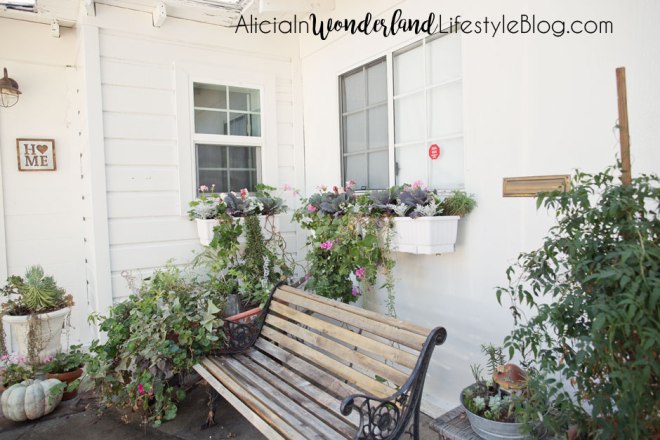
Later that day, E fell asleep for a rare but much needed nap, and I finally caved and let F play with my little herb garden planter outside our front door. While he was happily pinching my basil, my husband came up with a funny idea to take a cell phone pic of him as a “sweaty” Chip Gaines. So hilarious if you know how often this poor guy is actually this sweaty on his “days off work” while he’s working on our house lol. This time it was just water though. 🙂 I am thankful that I have this great man to keep me sane in the chaos of our lives. 🙂 He keeps me laughing when things get challenging!

14632940_1383006308377855_7609315446872951047_n

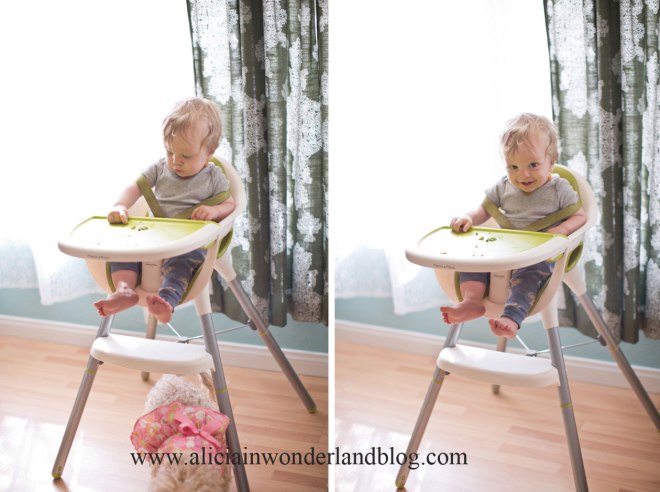
I can’t even believe it but our sweet little Baby F is nine months old today! It is bittersweet for me as he is getting older. More of his nature loving personality is coming out, and I see more and more of myself in his personality (even though he is the spitting image of my husband!). My husband and E groan when I say it’s time for everyone to help work on the garden, but when Baby F hears me say that, he crawls as fast as he can to get outside, with a big smile on his face. 🙂 I am sad because I know he will be our last baby, and after spending so much time pregnant over the course of 5 years, it is hard to believe the baby portion of our lives is nearing an end. I am looking forward to having quite an enthusiastic little partner by my side in the garden though! 🙂

by0a0830
by0a0832
by0a0837

I’m back! Lots of changes around here! Front of house updates….

I stopped blogging here on my lifestyle blog a while back after there were a couple of negative incidents that I just didn’t feel like dealing with anymore. Lately, I have really been missing documenting our crazy journey with our garden and our endless list of projects for fixing up our little fixer upper house. My photo studio finally feels “finished” and all of the projects in there are done, so now we are able to focus our energy on finishing up the projects in our house. We had dedicated time previously for working on our house and then projects for my studio kept coming up and our house had to keep getting pushed to the back burner.

I realized this morning that when our second son was born, apparently my URL for this blog expired and since I was in the hospital, I missed the email about renewing. I had assumed that it was set to auto renew but it was not. So now of course, someone has purchased my old domain so here I am, starting fresh with this blog, with a brand new URL, aliciainwonderlandlifestyleblog.com. I actually like this better since it helps give more differentiation between this blog and my photography blog (http://aliciainwonderlandphotography.com/blog).

So I am going to start posting some updates on what we have been working on lately! The front of our house has always driven me crazy. Our little house has had several small additions from the previous owners, and it wasn’t all necessarily done properly. The laundry room was added on, the entry room was added on at another time, and of course my office/studio area was also an addition too. Unfortunately, the way that they did everything, they used a different type of siding for each addition, and the roofing was not done well. The fascia and soffits were rotting and my husband kept starting to work on replacing it all but kept getting sidetracked with other projects and life with two little kids!

I finally couldn’t take it anymore and started trying to come up with a faster, easier way to get the exterior of our house (and my studio) looking better and less dingy and falling apart. I realized that I don’t like the look of fascia and soffits anyway, and much prefer the way the house looks with them removed! We want to eventually replace all of the siding anyway, but that is such an involved project and it means both my husband and I lining up time when neither of us is working so we can get that done. That may have to wait until next year. 🙂 So in the mean time, I was tired of the dingy, ugly cream exterior paint color that we have had since we moved here. Every time we drive up to the house, my husband and I both felt this sense of YUCK when we saw that color. It was just a subtle change, but my husband went through and used a paint sprayer and gave the front a fresh coat of creamy white paint to freshen things up a bit. I am so relieved that it is starting to look better! I can’t wait until it is all the way finished, but in the mean time, this is a much better improvement! 🙂

I had previously painted our front door a dark green, which I quickly grew tired of. Now it is painted a matte black and I love it. It gets dusty pretty fast but other than that, I love the color. Eventually I still want to replace the door with a craftsman style door, but for now this is okay. I loved the screen door my in-laws got for their house in Texas, so we ordered the same one (from Lowes) and I love having a wreath hanging from the screen door. Our next door neighbors have a big huge magnolia tree and I love seeing it outside our bedroom window when I wake up in the morning. It made me fall in love with magnolia flowers and leaves, before I recently started watching Fixer Upper. 🙂 In the Spring & Summer, I had a different magnolia wreath on the door that I found at Michael’s and it has big pretty white magnolia flowers. For Fall/Winter, I thought this one from Magnolia Market would be nice to switch things up a bit.

I found the Texas star for my husband, and I like the HOME sign on the opposite side since it helps get rid of confusion when my clients arrive and have to figure out which door is my studio and which is our house. I love the new exterior lights since they feel kind of like a mix between industrial style and seaside cottage.

Since our house used to be a nursing home, there were handicapped ramps outside every door previously. That actually surprisingly came in handy during the periods when I needed to use a wheelchair (my pelvis dislocated/fractured during labor with our first son). Now that I am done being pregnant, my husband was excited to start smashing up the concrete ramp outside our front door. He hasn’t 100% finished that project, but it is nice that we can actually fit a real door mat now in front of the screen door. 🙂 I actually bought two matching door mats, one for my office and one for our house, but then realized the one in front of our house door wouldn’t fit because of the ramp and he started demo-ing the ramp the next day while I was out. I was a bit shocked to come home and see what he had been up to while I was gone lol. We were watching a standup comedian recently on Netflix who talked about her “party goblin” and my husband and I joked that he and I each have a “Project Goblin”…we will be working on one project and then the Project Goblin will come along and say “hey the house would look so much better if you got rid of that ramp! Let’s smash stuff up now!” And so thanks to Project Goblin, we always seem to have about 50 projects going on simultaneously. 🙂

by0a1496
I did a front door makeover post previously (here), and the cross I had made for our door before unfortunately got smashed up by some quite rude Trick or Treaters one year. I tried to repair it, but it kept falling apart. I ended up taking the one I had made for our son’s bedroom and relocating it to the front door and I actually like this one a lot better anyway. 🙂
by0a1502

I had some window boxes up in the front for a while now, but realized I never posted any pictures of them. They were nothing special, just your average metal window boxes from Big Lots with coco liners. I thought they were cute at first, but they really do not hold the moisture well in the soil. I had to end up watering them every day or every other day with a little bit of water since they dried out so fast, and it started to feel like a huge burden. I absolutely love having window boxes, but started to feel like a prisoner to the house with needing to make sure they were watered so often. Since our older son has recently started preschool, I started thinking about ways I could streamline my morning routine, and watering the window boxes took up a significant chunk of time each day. My husband suggested installing a drip system emitter on each window box but I like my window boxes densely planted which mean so many tubes and emitters and it would just end up looking ugly. I was determined to find another solution!

I started looking into self-watering window boxes, and most were way out of my budget. I didn’t want to end up spending near $500 just to save myself some time and save a little water. Then I found some from Gardeners.com and they were much more affordable! I also ordered their special self-watering planter soil and got a fresh start with some new fall annuals (and some leftovers from my summer window boxes). I put in some Dusty Miller, pansies, ornamental kale, stock, along with the older geraniums, string of bananas and daisies. I am so excited with these new window boxes! I feel like it is going to save me so much stress every week…not having to worry about whether or not my window box flowers are about to drop dead because I overslept on a day when we are having a random heat wave! 🙂

by0a1500
by0a1505
by0a1513
Previously, I had my herb garden under the arbor in our front yard (seen in this post), but the whole thing didn’t work out as I had hoped there. Everything started getting drowned in pine needles since that spot is so close to two of our big pine trees. The little fence started getting worn out and leaning, and just looked really shabby really quickly. So I relocated the herbs elsewhere.

I like my herbs to be as close to the kitchen as possible but since there is a big pine tree right outside the kitchen door, I have to put the herbs outside other doors. I don’t want to have to walk all around the backyard to collect herbs in the dark when I am cooking dinner. I put the culinary herbs that prefer consistently moist conditions here under the laundry room window. I put all of my herbs for flavored teas in my wheelbarrow planter near the bench (actually going to be swapped out for a regular planter soon because I am tired of the “Pinteresty trash-to-treasure” look to it). All of my Mediterranean herbs got relocated alongside our patio and I will do a post once I finish revising that area soon. 🙂

by0a1516by0a1510

Curious about the original before picture? I realized for some reason I never really took any before pictures of this area of the house, but here is a picture from the listing when our house was for sale. You can see that the planter area under the laundry room window was pretty pathetic looking before my husband added a much better edging to that area!

I blurred out part of our house number for privacy, but you can see that the house numbers were listed in quite an ugly, outdated font. They have been driving me nuts for a while and I finally ordered some new numbers (my husband hasn’t put them up yet). When I explained to him that the font on those numbers was driving me crazy, he sighed an exhausted sigh of frustration. He said, “sometimes I wish I hadn’t married a woman who has been educated in design and fonts and aesthetics. Ignorance is bliss!” I feel sorry for him with my never ending list of projects but the new numbers are going to look so much better! I can’t wait to show the finished result! 🙂
isukzn9hvvc83

Transitioning from Baby’s Nursery to Toddler’s Room

You may have seen my previous post about our son’s baby nursery design. Now that he is no longer a baby, I have made several changes to his room and wanted to do a follow up post with his updated room. One of the major changes was that I rearranged all of the furniture. I wanted to create a layout that gave him more room to play on the floor. Also, he started climbing up on the daybed to look out the window at the garden. Previously, the daybed was just on the edge of the window, so as soon as I saw him leaning over to look out the window, I started rearranging all of the furniture. We also found two cute rugs at Ikea that work well in the middle for a cozy play area.

aliciainwonderlandblog

I wanted his toys to be organized and accessible for him, so I got the toy box at Ikea also, and ordered the toy hammock online to hold all of his stuffed animals (how did we accumulate so many of those so quickly?!).
aliciainwonderlandblog

The picture frames are all empty for now, until I eventually get around to ordering prints (you would think we don’t have any pictures of our son or something with all of those empty frames!). The octopus kite was a cool vintage find in E’s favorite color, red. I let him pick out a plant for his room one day when we were out plant shopping, and he picked out a spider plant. 🙂
aliciainwonderlandblog
This wall has new items, all crafty things that E and I have made together. The weaving was our first craft project together. He handed me nails and helped me make the loom on the back of an old drawer, and helped me pick out yarn from the stash of yarn that I used for his newborn photoshoots.
aliciainwonderlandblog

These are a couple of activity boards that I made for him. The one on the left is a little magnetic board, that we use with magnetic numbers and letters for learning time. The rest of the time, I keep the letters and numbers packed away since they just end up all over the house otherwise. 🙂 The board on the right is an old cork board that I turned into a fun felt story board. I purchased some felt stickers of owls, fish, bees, and ladybugs at Joann’s Fabrics and then cut out some trees and a pond. I put Velcro on the back of the animals and bugs and E loves playing with them and moving them around. Sometimes the fish even end up in the trees. 🙂
aliciainwonderlandblog
This branch was another project E and I made together. He loves trees, so I took a branch that I pruned from our yard and we covered it with fabric scraps to hang up in his room.
aliciainwonderlandblog
His cloud bunting is still up, with the addition of a (temporarily empty) frame above it.
aliciainwonderlandblog
We are still cosleeping at night, but I am trying to encourage E to use his crib for naps. He was never a fan of the crib, but since my husband converted it to a toddler bed, he is much happier with it. E is an awful napper for the most part, but I was beyond excited a couple of times recently when after playing in his room, he climbed up into his bed on his own and took a nap. 🙂
aliciainwonderlandblog
E loves to pick out his shoes each day, so I have his box of shoes down low and accessible, along with plenty of books and a few toys.
aliciainwonderlandblog
This vintage print was an amazing antique store find. 🙂
aliciainwonderlandblog

That’s it! I also moved the changing table out of this room, into the hallway near my office for a couple of reasons (first so that my clients could use it without having to go into the the personal area of our house; second since it was not very much fun to play on the floor next to a diaper bin!). Pretty much everything else is the same. I try to keep things organized and keep clutter to a minimum so the room does not turn into a huge disaster. Our bedrooms are so small, so keeping them organized is so important! We may do a decluttering round soon on some of those stuffed animals. :-/

Disclaimer: the post above contains an affiliate link for your convenience.

Backyard Update – Lots of Paint!

Those who follow me on Instagram may have seen some snapshots of my progress with this project this week (@apluscphotography). I have been busy painting all of our finds for the backyard in shades of white and cream so things will look more cohesive and like my dream shabby chic garden. I went through a few different types of paint before I found the ones that I liked the most. I ended up settling on two from Rustoleum (I found both at The Home Depot). I have been painting early every morning while our baby is sleeping, and again while he naps in the afternoon.
yard

For our bridge, I wanted a slightly textured look, so I used the Multicolored Textured paint in the cream color. For the rest of the items, I found that I liked the Ultra Cover Paint + Primer in Heirloom White the best. The add-on handle really helped cut down on my arthritis pain from when I broke my fingers and wrist (relying on a bicycle as your method of transportation in Los Angeles is dangerous business).

I tried some other paints first and the whites were too cold and didn’t provide enough coverage. I absolutely love the warm, creamy tone of the Heirloom White. I am hoping to finish up painting today so my husband can start trenching the irrigation lines tomorrow morning! 🙂

paint

Garden Updates & How We Celebrated Our Anniversary

First, I am going to start this post with a few exciting seasonal updates with our garden.

The first is…I finally pruned our grape vines! They were already existing when we bought the house, and in desperate need of pruning. I estimate that it has been at least 3-4 years since they were last pruned. When we bought the house, we were in escrow during the time they should have been pruned. I was already sneaking in earth worms and compost…pruning things before the house was officially ours might have been a bit strange. 🙂 Then last year, they got ignored again while everything was chaos with my pregnancy bed rest. I was pretty happy to finally be able to get rid of some of the excess growth. We wanted to replace the fence that they grow on, but I have a feeling that will have to wait until next year since we are in the middle of a major project in the back, and the new leaves have already started coming in.

BY0A9742

The first of this season’s grape leaves!
BY0A9747
I finally was able to prune our mature peach tree as well! Also below, all of our citrus has been sprouting blossoms like crazy ever since I fed them with a bunch of my homemade compost. 🙂
BY0A9743

This is one that I am very excited about…we are going to be getting our first home grown cherries! I planted two dwarf cherry trees, and it took a lot of research to find out which varieties of cherry trees will actually produce fruit here in Southern California. Since we don’t get very cold in the winter, most varieties of cherries won’t produce fruit here. Our neighbor paid his landscaper to plant some cherry trees in their yard a few years back, and the landscaper keeps making excuses why the trees haven’t produced any fruit. I bet our neighbor that my trees would make fruit before his ever do (since his are the wrong type for producing fruit in this climate). I’m going to be so proud when these little cherries are ready to pick. 🙂
BY0A9749

Since our backyard and normal vegetable area is about to undergo a huge makeover, I planted a bunch of lettuces in one of our wine barrels. Time for some salads! 🙂BY0A9753

I also planted a ton of nasturtiums in flower pots since I love the way they look and I also love using the flowers in salads. I just think it is so beautiful when new life springs up out of the dirt.
BY0A9756

Finally, I get to the backyard project! Recently, we debated doing an addition to our house, to enlarge the bedrooms a bit. Our bedrooms are all pretty tiny. When all of the estimates told us we would probably have to spend somewhere in the $200,000 range just to add on an additional 500 square feet of living space, we decided it was not a project we plan to pursue. Our bedrooms are small and cozy and that is fine. We recently watched Once Upon a Time in Wonderland and liked the way the genie had his bottle decorated anyway! Our bedrooms feel a bit like a genie bottle at times since they are so small, but it does not make sense to spend so much just to make them a bit bigger. It definitely would not increase the value of the house that much. Instead of adding onto the bedrooms, we decided to create our dream backyard and our ideal outdoor living space. We could have gotten a house with bigger bedrooms elsewhere, but part of why we picked this house was because the weather is nice here (5 miles from the ocean) and we have a lot of outdoor space.

Originally, we planned to start on this project sooner, but the recent rain storm here in Southern California delayed our start a bit. Our three year wedding anniversary was on Tuesday, and we decided that we wanted to celebrate our anniversary by really digging into this project, literally. 🙂 We are both really excited about what we have planned for this area. It is all going to be grass free, with drought resistant plants. There are going to be a bunch of different shaded seating areas for entertaining. To start, my husband rented a sod cutter to remove all of the old grass (it was mostly dead and weeds anyway).
BY0A9760

Then we went on a treasure hunt for a bunch of garden accents. There are still a bunch of things that we are looking for, but we are really excited about some of the things we have found so far!
BY0A9762

E likes these hand painted planters that I found. 🙂
BY0A9763

We are trying to get this yard finished up in time for E to have a birthday party. I apologize for those who know me…we may be a bit M.I.A. for the next few weeks while we work on all of this. I am going to be blogging our progress though as the project continues! Coming up soon, I will also be writing about my first experience with wine tasting! 🙂

Our Living/Dining Room Reveal!

This post has been put off for a long time now. I kept feeling like our living/dining room was never “finished”. There were a lot of details that we had put off, and I didn’t want to photograph the room until they were completed. Some were silly things, like I felt there weren’t enough plants in the room. Ironically, when I took these pictures, a lot of the hanging plants were actually draining off in the bathroom anyway after being watered. 🙂 Anyway, without further delay, here is the heart of our home, our living room. This is where we spend most of our time.

The big cozy couch pillows are everyone’s favorite thing in the room. I made the pillow covers out of the pashminas that I used for a while as our bedroom curtains at our old house! 🙂 There are lots of tiny plants throughout the room that I recently propagated from cuttings, which I am really excited about (full post about that coming soon). Our house is finally starting to feel like our home now that this room is coming together. 🙂 I’m not thrilled that there are a few photo props stashed around since I am running out of storage in my office and studio, but other than that, I really love this room!

01aliciainwonderlandblog 02aliciainwonderlandblog 03aliciainwonderlandblog 04aliciainwonderlandblog 05aliciainwonderlandblog 06aliciainwonderlandblog 08aliciainwonderlandblog 09aliciainwonderlandblog 11aliciainwonderlandblog 12aliciainwonderlandblog 13aliciainwonderlandblog 15aliciainwonderlandblog 16aliciainwonderlandblog 17aliciainwonderlandblog 19aliciainwonderlandblog 20aliciainwonderlandblog 21aliciainwonderlandblog 22aliciainwonderlandblog 24aliciainwonderlandblog 25aliciainwonderlandblog 28aliciainwonderlandblog 29aliciainwonderlandblog 30aliciainwonderlandblog 31aliciainwonderlandblog 32aliciainwonderlandblog

Bathroom Makeover Reveal!

When we originally bought this house, one of the first things we planned to do was gut the master bathroom since it was so incredibly ugly. We hated the handicapped bars in the walk-in shower. I wanted to get rid of the shower and install an antique clawfoot tub. We couldn’t stand the forest green tiles with the pale green walls. The sink and countertop were made out of some awful, really porous material that kept every stain (that really did not work well when coloring my hair). The sink also had a leak, and the vanity was starting to rot away. We also didn’t love the glass block windows since they looked a bit outdated, but I did appreciate how much light they let in. It seemed like we would definitely be tearing everything out and starting from scratch.

However, our first major project had to be the kitchen since that was barely even usable when we moved in. Then once I got put on pregnancy bed rest, we decided the bathroom project would have to wait since I couldn’t walk all the way to the guest bath. Before you know it, I was sitting in my hospital bed after E was born, reviewing  a handicapped products catalog with an occupational therapist. Suddenly, I felt like our hideous handicapped bathroom was actually a blessing in disguise from God, saving us a major expense and project. I decided that I would make some lemonade out of a huge lemon, and see how I could improve the bathroom without having to do a complete remodel. Now that I have to use a shower chair, I can’t use our tiny guest shower in a practical manner since it is a bit too tight.

The first thing my husband did was remove the vanity and sink. He used leftover bits of bamboo counter from the kitchen to make the new bathroom counter. He cut a hole in the wood for the sink, following the instructions from the sink manufacturer. Unfortunately, we then realized that the instructions they gave were for a hole that was too big, and made the sink sit way down inside the counter. To counter this problem, I came up with the idea of surrounding the bowl with a mosaic. It took me a long time to get that mosaic perfect since the pieces I used were all of varying thickness, but we absolutely love the end result!

Next he replaced the medicine cabinet to something with a bit more style. He bought lights but soon realized that he would need to replace a big  chunk of wall to switch out the lights since the previous owners left a mess behind the light fixtures. The lights are going on the “good enough for now” list. 🙂

After that, I started working on finding a way to make the existing colors and features in the room feel cozy and intentional, and less outdated. I painted the same dark tan that is in our bedroom, which I love against the forest green and brown flooring! I re-stained the grout to freshen everything up. I brought in tons of amazing exotic plants, a bohemian dream of a shower curtain that I found at World Market, and some other little finishing touches that really seem to complete the room. One of my favorite things is the plant hanger next to the window. Suddenly, with the plants there, the glass block window doesn’t bother us anymore! The best part was that the plant hanger display that I put together for the window was all with bits and pieces of things that I found around the house.

I absolutely love the end result, and am perfectly fine if we never get around to a “full remodel”. My most hated room of the house has quickly turned into my little bohemian spa retreat and I am so happy. 🙂

Here is the before picture:

tumblr_m33z2eMkHQ1qh2ttzo2_1280

And the after photos….The flooring isn’t really shown in the new pictures since it is still the same (and that is the one thing that I still do not love). Eventually we will get around to replacing that once we decide if we are going to reconfigure the bedroom layout and redo all of the flooring at that point.

apluscphotography_bath13
apluscphotography_bath01 apluscphotography_bath04 apluscphotography_bath05 apluscphotography_bath08 apluscphotography_bath12 apluscphotography_bath15 apluscphotography_bath16 apluscphotography_bath17 apluscphotography_bath18 apluscphotography_bath19 BY0A0382

Free Christian Nursery Printable Artwork!

When I was making the wall art display for our baby E’s nursery, I designed some religious themed artwork to frame and hang on his wall. I included the two Bible passages that inspired me the most during my pregnancy as well as a very inspirational quote from one of our favorite saints, St. Francis of Assisi. You can see how I integrated them into the design of his room here. I wanted to share them with all of you in case anyone else finds inspiration from these quotes as well! Click on the images below to be brought to a printable pdf version of each image. If you decide to use these, feel free to show me pictures of how you used them in your home!

samuel
francis psalm139

Our Baby Boy’s Nursery Tour!

Yesterday’s post explained a little about how I got out of my creative slump a few months back, despite being on pregnancy bed rest. I originally had plans to design our baby’s room in a woodland style theme, with a large tree mural on one wall. However, once I started looking at pictures of baby rooms online, I realized that so many people seem to have had that same idea recently and I got pretty discouraged. Our neighborhood is named after all of the large mature pine trees here, and that is our favorite thing about this area. When we first saw all the trees in this neighborhood, we both instantly knew that this would be our home. 🙂

I wanted to create a nursery design that would reflect our love of the outdoors, and still show my unique design style. The idea of a tree mural had to be scrapped since I could not paint a wall while on bed rest anyway. My challenge was to find ways to reflect the look that I wanted, via projects that I could create while lying in bed. Normally, sewing and painting projects would be my first go-to option, but since I could not sit up and sew anything until recently, I had to use other methods of creating for most of the decorations. Even more of a challenge: I primarily had to use whatever supplies I had on hand in my craft room since I could not go wander around any craft supply stores for quite some time. In the end, I went with a nature/outdoors/garden/forest kind of theme, with a little inspiration thrown in from The Lorax (the mobile over the changing table has my version of truffula trees!).

Despite all of these restrictions, I absolutely love the end result. My husband did an amazing job redoing the walls, adding insulation to the exterior wall, and creating a custom frame for the window trim. We wanted to replicate the look of the trim in our old craftsman rental house. You can see the before pictures of this house here.

Some interesting items worth noting…the tiny rocking chair was given by my great-grandmother to my mom, then to me (I sewed the little “Rockin Cowboy” cushion). The hamper was a baby shower gift from when I was born. 🙂 I found the changing table for free on Craigslist and was originally planning to use it as a plant stand in my patio area outside. When I realized it went well with our crib, my husband sanded it down, repainted it, and made new shelves for it. The daybed was originally intended for our living room, but that didn’t end up working as well as we had hoped. I wanted to make sure that I have a pet-free bed to nap in after feedings, so we moved it into the nursery. The needlepoint pillow in the middle of the daybed was embroidered by my grandma, and sewn together by me.

The framed wall art is a mix of items. I found the vintage Winnie the Pooh prints at a thrift store a while back (actually during my first pregnancy just after we got married). I have been hanging onto them since them, waiting to be able to use them. 🙂 The owl prints were a free printable that I found via The Handmade Home. I sculpted the cross and made the yarn covered “E”. The round empty embroidery hoop on the wall is left intentionally blank for now. Once he is born, I will be making an embroidery design with his name and birth date. The prints with the Bible quotes and the quote from St. Francis are printables that I designed myself. They will be coming soon to the blog as well!

I am so happy with the finished room, and can’t wait for the little guy to join us in his room! The cats love the room so much that I have trouble keeping them out. 🙂 Two walls were intentionally left fairly empty to leave room for all of the photographs that we are bound to take of our little guy.  In the next few weeks, I will be posting tons of DIY instructions on many of the various projects I made!

Alicia in Wonderland Blog - Baby Boy's Nursery Tour

Alicia in Wonderland Blog - Baby Boy's Nursery TourAlicia in Wonderland Blog - Baby Boy's Nursery TourAlicia in Wonderland Blog - Baby Boy's Nursery TourAlicia in Wonderland Blog - Baby Boy's Nursery TourAlicia in Wonderland Blog - Baby Boy's Nursery TourAlicia in Wonderland Blog - Baby Boy's Nursery TourAlicia in Wonderland Blog - Bed Rest Survival GuideAlicia in Wonderland Blog - Our Baby Boy's Nursery Tour! Alicia in Wonderland Blog - Our Baby Boy's Nursery Tour!Alicia in Wonderland Blog - Bed Rest Survival GuideAlicia in Wonderland Blog - Baby Boy's Nursery TourAlicia in Wonderland Blog - Baby Boy's Nursery TourAlicia in Wonderland Blog - Baby Boy's Nursery TourAlicia in Wonderland Blog - Baby Boy's Nursery Tour Alicia in Wonderland Blog - Baby Boy's Nursery Tour Alicia in Wonderland Blog - Baby Boy's Nursery TourAlicia in Wonderland Blog - Baby Boy's Nursery Tour Alicia in Wonderland Blog - Baby Boy's Nursery Tour Alicia in Wonderland Blog - Baby Boy's Nursery Tour Alicia in Wonderland Blog - Baby Boy's Nursery Tour Alicia in Wonderland Blog - Bed Rest Survival GuideAlicia in Wonderland Blog - Baby Boy's Nursery Tour

Alicia in Wonderland Blog - Baby Boy's Nursery Tourhamper Alicia in Wonderland Blog - Bed Rest Survival Guide Alicia in Wonderland Blog - Baby Boy's Nursery TourAlicia in Wonderland Blog - Baby Boy's Nursery TourAlicia in Wonderland Blog - Baby Boy's Nursery Tour Alicia in Wonderland Blog - Baby Boy's Nursery Tour

Hallway Makeover

I actually finished the makeover on this hallway a while back, but since I hadn’t unpacked the curtain rod that I wanted to use with the curtains, I hadn’t blogged the transformation yet. You can see the before pictures here. This is the hallway that leads from our entry room into my office and studio area. I use the vintage trunks and suitcases to store photo props and blankets. I added some of our favorite photos and some touches from our wedding decor to personalize the small little space, including our floral monogram banner that I made. The hallway is also most likely going to end up being where we keep the baby’s stroller. 🙂

Alicia in Wonderland Blog - Hallway Makeover Alicia in Wonderland Blog - Hallway Makeover Alicia in Wonderland Blog - Hallway Makeover Alicia in Wonderland Blog - Hallway Makeover Alicia in Wonderland Blog - Hallway Makeover