Our Living/Dining Room Reveal!

This post has been put off for a long time now. I kept feeling like our living/dining room was never “finished”. There were a lot of details that we had put off, and I didn’t want to photograph the room until they were completed. Some were silly things, like I felt there weren’t enough plants in the room. Ironically, when I took these pictures, a lot of the hanging plants were actually draining off in the bathroom anyway after being watered. 🙂 Anyway, without further delay, here is the heart of our home, our living room. This is where we spend most of our time.

The big cozy couch pillows are everyone’s favorite thing in the room. I made the pillow covers out of the pashminas that I used for a while as our bedroom curtains at our old house! 🙂 There are lots of tiny plants throughout the room that I recently propagated from cuttings, which I am really excited about (full post about that coming soon). Our house is finally starting to feel like our home now that this room is coming together. 🙂 I’m not thrilled that there are a few photo props stashed around since I am running out of storage in my office and studio, but other than that, I really love this room!

01aliciainwonderlandblog 02aliciainwonderlandblog 03aliciainwonderlandblog 04aliciainwonderlandblog 05aliciainwonderlandblog 06aliciainwonderlandblog 08aliciainwonderlandblog 09aliciainwonderlandblog 11aliciainwonderlandblog 12aliciainwonderlandblog 13aliciainwonderlandblog 15aliciainwonderlandblog 16aliciainwonderlandblog 17aliciainwonderlandblog 19aliciainwonderlandblog 20aliciainwonderlandblog 21aliciainwonderlandblog 22aliciainwonderlandblog 24aliciainwonderlandblog 25aliciainwonderlandblog 28aliciainwonderlandblog 29aliciainwonderlandblog 30aliciainwonderlandblog 31aliciainwonderlandblog 32aliciainwonderlandblog

Hallway Makeover

I actually finished the makeover on this hallway a while back, but since I hadn’t unpacked the curtain rod that I wanted to use with the curtains, I hadn’t blogged the transformation yet. You can see the before pictures here. This is the hallway that leads from our entry room into my office and studio area. I use the vintage trunks and suitcases to store photo props and blankets. I added some of our favorite photos and some touches from our wedding decor to personalize the small little space, including our floral monogram banner that I made. The hallway is also most likely going to end up being where we keep the baby’s stroller. 🙂

Alicia in Wonderland Blog - Hallway Makeover Alicia in Wonderland Blog - Hallway Makeover Alicia in Wonderland Blog - Hallway Makeover Alicia in Wonderland Blog - Hallway Makeover Alicia in Wonderland Blog - Hallway Makeover

Entry Room Updates

We recently went through and made a few updates to our entry room to get it even more organized than it was before. 🙂 You can see more details on the previous post here.

Here is the new layout…a few items were shifted around to make room for the armoire, and a few new smaller items were added as well.

Alicia in Wonderland Blog - Entry Room Updates

Alicia in Wonderland Blog - Entry Room Updates

I had this white armoire in storage at my parents’ house, and we realized that it would be perfect in our entry room since there is no coat closet in this house. At first I did not think it would work out well in this room since the floor is sloped (to allow the house to be handicapped accessible – the entry room used to be a porch with a step). However, my husband was able to use some shims to keep the armoire level, and we love finally having a “coat closet” in our entry room.

Alicia in Wonderland Blog - Entry Room Updates

Inside the armoire, I put my box where I keep all of my gloves, and other miscellaneous items that I always seem to be looking for in a hurry when leaving the house.  On the same shelf is my hiking backpack, with all of our supplies for us and the dogs when we go on a hike.

Alicia in Wonderland Blog - Entry Room Updates

The armoire is the perfect spot for my husband to hang all of his black jackets as soon as he gets home, which has been helping keep them pet hair free. I also hung an old sweater organizer that I was no longer using, which makes a great organizer for shoes of a variety of sizes. The similar hanging shoe organizers never seem to work for me since they only hold standard size shoes. Using the sweater hanger allows us to fit in all of the shoes that we use the most often, including a couple of pairs of small boots.

The cross is something I have had for a long time, and was excited to find after it having gone missing for a couple of years. 🙂

Alicia in Wonderland Blog - Entry Room Updates

I added a couple of things to our entry table organizing: hand sanitizer for every time I come home from running errands (my immune system has gotten very weak after so many months of bed rest), earplugs (my husband always seems to be looking for a pair when he is working on loud projects), and sunscreen in the basket (he is bad about remembering to put some on before he goes out).

Alicia in Wonderland Blog - Entry Room Updates

Umbrellas, a parasol for sunny days, rain boots, and my gardening boots.

Alicia in Wonderland Blog - Entry Room Updates

I found the little cream scalloped box shelf at a thrift store, and it is the perfect spot for my husband’s sunglasses when he gets home. We put up a cute hanger to hold my favorite sunglasses. We have started using the chalk boards to keep track of our to-do lists and lists of projects around the house. We keep all of the important lists in our organizer app (we use Cozi on our phones and online), but it really helps us keep motivated to see the lists of projects written out right on the wall. We love crossing items off the list. 🙂

Alicia in Wonderland Blog - Entry Room Updates

More room tours coming soon!

My Home Office!

My Home Office!

I have been waiting to unveil this room for quite some time now. 🙂  So far, it is my favorite room in the house.  I can make things as pink and girly in here as I want with no complaints from anyone else. 😉  There were a lot of projects that went into creating this room.  You can read about the ceiling here, my custom cabinet knobs here, my DIY lampshade here, my fabric covered bulletin board here, and the flooring fiasco here.  You can also see the before pictures here.  My office is bedroom #4 in the before pictures (also last used as an office).

tumblr_me9oftM8Ys1qh2ttzo1_1280

tumblr_me9oftM8Ys1qh2ttzo9_1280

I used the same two desks that we had in our old rental house (seen here), but I wanted a more cohesive look.  I primed and painted the two desks a matching shade of “fig” purple.  I painted the floor a gray with a hint of purple, and found two pinks that I love for the walls and built-in cabinets.  This room has tons of storage closets with shelving and drawers which works perfectly for all of my craft supplies, camera gear, photo props, etc.

tumblr_me9oftM8Ys1qh2ttzo2_1280

tumblr_me9oftM8Ys1qh2ttzo8_1280

tumblr_me9oftM8Ys1qh2ttzo3_1280

When we moved in, the previous owners left behind their built-in “desk” and wall cabinet.  The very haphazard desk had to go, but I decided to find a way to spruce up the open wall cabinet.  I painted it all white, glued vintage laces to the edges of the shelves, and added two types of pretty printed shelf liner paper to the back of the cabinet.  I went with shelf liner paper since I didn’t want to buy a whole roll of wallpaper for such a small area.  It was kind of difficult to match up the patterns along the seams, but I am so happy with the end result!

tumblr_me9oftM8Ys1qh2ttzo5_1280

tumblr_me9oftM8Ys1qh2ttzo7_1280

I have seen many home offices on other blogs and sites like Pinterest, and for some reason, it seems like people feel they are entitled to make snarky remarks about what kind of computer peripherals are incorporated into the space, as if that can make or break the design concept of the room.  I have seen countless comments along the lines of “would be a great room if she just went wireless!” or “ew, cords!”.  If the primary function of your home office is for pinning, bookmarking, tweeting, and reblogging, then by all means…why wouldn’t you have a wireless keyboard and mouse?  However, if you actually do real creative work with your computer, wireless accessories do not come anywhere close to the level of precision that traditional wired accessories provide.  I will take my tablet with its USB cord any day over a wireless mouse!  Even my husband initially tried to get me to use his wireless accessories, but those were very quickly put away.  My solution for dealing with all of the cords…I keep things neatly organized, use strong Velcro to keep the power strips in place below the desk, and made this cute little fabric skirt under the desk to cover all the cords.  I am pretty pleased with the end result. 🙂

tumblr_me9oftM8Ys1qh2ttzo6_1280

Easy DIY Project: Fabric Decorated Bulletin Board

I have been working on all of the finishing touches on my home office lately, and this is one of my recent projects.  I had previously covered my plain cork bulletin board with some pink vintage fabric at our old house, but I wasn’t thrilled with the end result for my new office.  For one thing, I didn’t want a pink bulletin board on a pink wall.  Secondly, the craft glue that I used the first time around was not the best choice (you can see in the first picture how it seeped through the fabric and left a visible mark).

tumblr_manxd46LSc1qh2ttzo1_1280

I selected some fun fabric to use this time, and decided to lay the new fabric over the old fabric since I liked the scalloped border on the pink fabric so much.  I measured out how large of a rectangle I would need, and then added about an extra quarter inch on each side to allow for a non-sew hem, and cut out my new fabric rectangle.

Once the piece was cut out, I folded in each side of the fabric and pressed with the steam setting on the iron.  When I got to the corners, I folded and steamed them in at an angle, kind of like when you make a bed with a flat sheet, and secured with a tiny dot of fabric glue.  After all of the edges were cleanly finished, I made sure the rest of the fabric was well ironed and wrinkle free.

tumblr_manxd46LSc1qh2ttzo2_1280

Since the craft glue that I used the first time was not the best option, I decided to try a glue gun this time around, and it worked much better.  I just glued the new piece of fabric in place, putting small amounts of glue around all the edges of the fabric.  That’s it!  Super easy project, and I love the finished result hanging in my office. 🙂

tumblr_manxd46LSc1qh2ttzo3_1280

tumblr_manxd46LSc1qh2ttzo4_1280

More of the office decorating projects coming up, and the full unveiling of my new home office coming soon!

One of Our Most Challenging DIY Projects So Far: Faux-Tin Ceiling Tiles

tumblr_mao2e0hELB1qh2ttzo1_1280

tumblr_mao2e0hELB1qh2ttzo2_1280

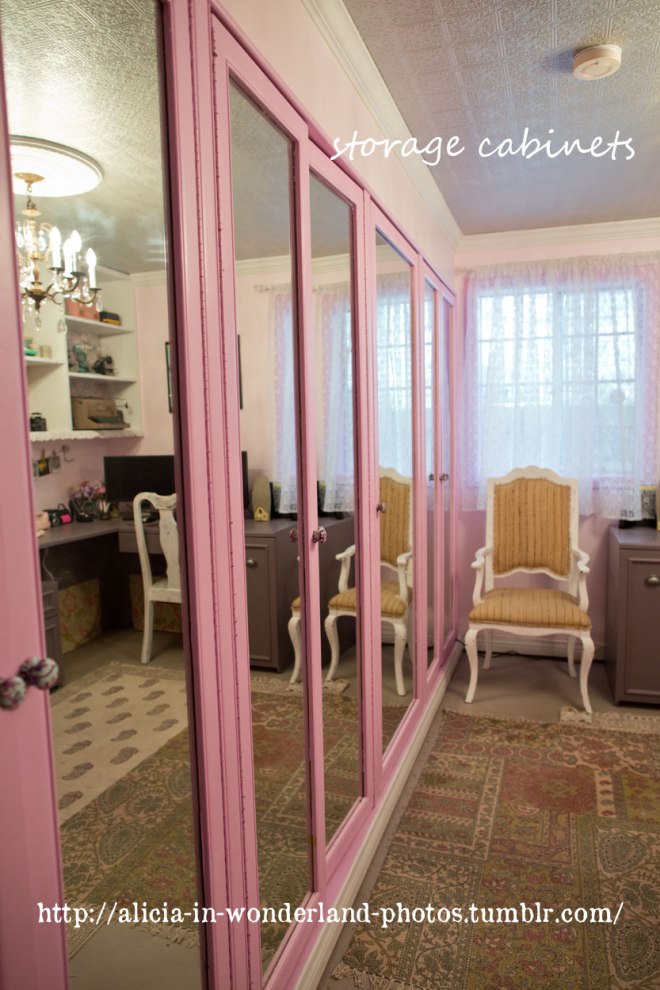
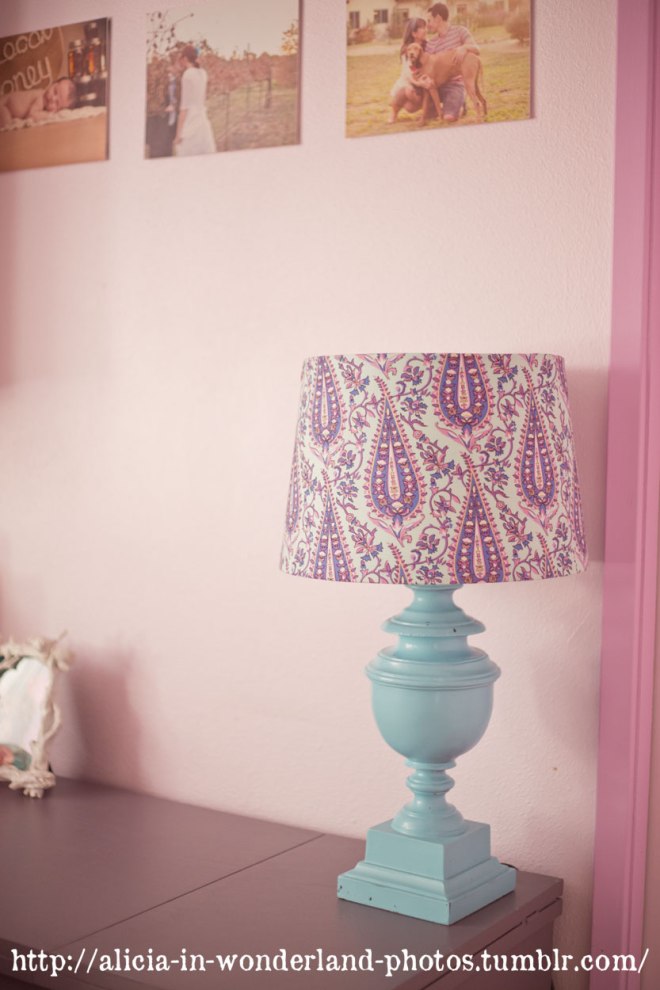
I love really old buildings, and really wanted to buy a house that was at least 100 years old.  My husband was not a fan of that idea, even though he has a shared love of all things vintage and antique.  We discovered while we were house shopping that most of the really old houses around here were built in what are now relatively unsafe neighborhoods.  Also, after we had so many problems with the craftsman house that we were renting previously, my husband convinced me that it would be better to buy a newer house and give it some of the old-fashioned details that I love.

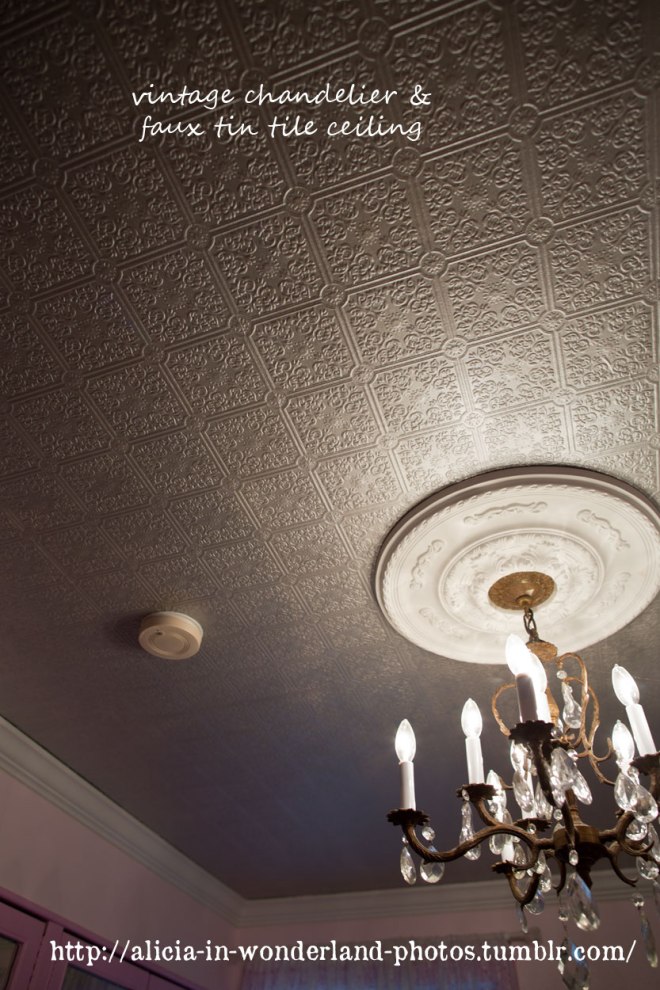
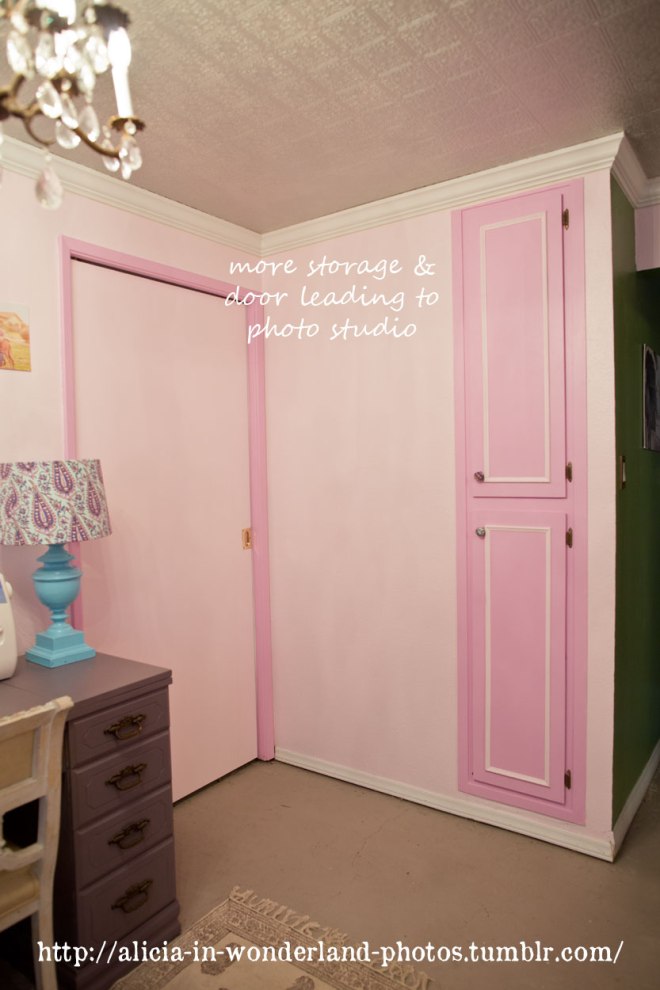
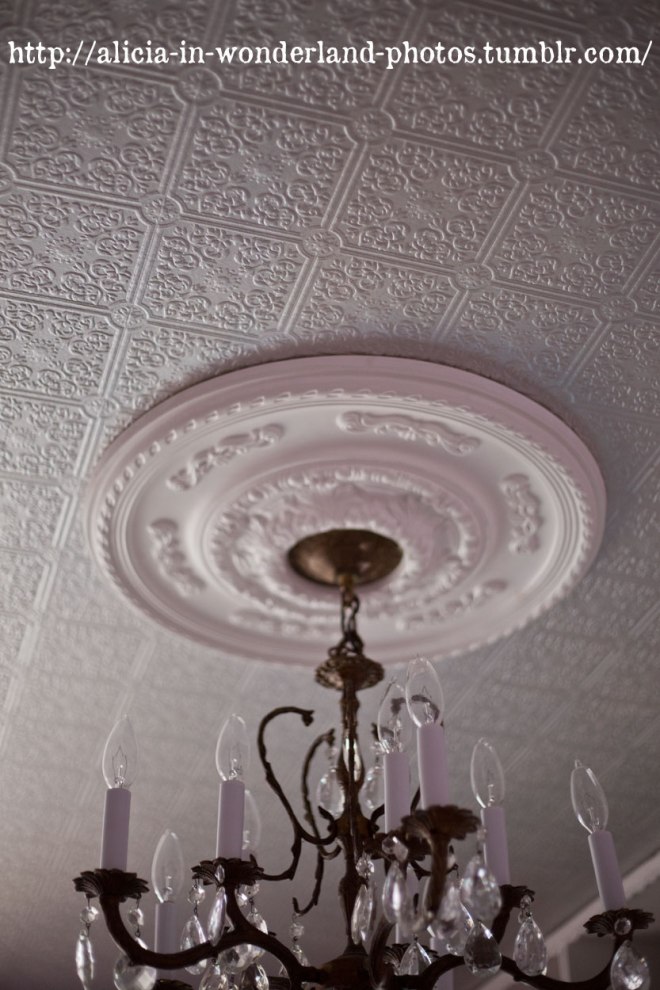
I love old antique tin tile ceilings.  We wanted to replicate this look in my home office.  I looked at some of the new ceiling tiles that are sold now, and the patterns were all too large for the scale of my small office.  We decided to go with textured paintable wallpaper that was made to look like tin ceiling tiles.  We had no idea how much work it was going to be to get this project completed.

While both my husband and I have used wallpaper in the past, we have not ever used the self-adhesive type of wallpaper.  We thought it would be easier, but I am convinced that it was not easier at all.  We had to soak the strips for a set amount of time, per the instructions, which did not seem to be quite enough on the first strip.  The first strip was too dry, and we had to end up wetting it quite a bit while we were trying to put it up.  We both ended up with soggy wallpaper falling into our faces since it was not adhering to the ceiling.

We soaked the second strip for a little bit longer, which ended up being too long.  It was a soggy mess and tore in a few places while we tried to place it up on the ceiling.  By the third or fourth strip, we finally seemed to find a good soaking time that seemed to work for us.  It definitely helped having two people working on the task while trying to adhere the paper to the ceiling, both of us on a ladder.

Halfway through the room, we decided to take a break and go to a coffee shop.  Since it was a particularly hot day, I was craving an iced coffee. However, since I am pregnant, I am not drinking any caffeine.  I ordered an iced milk with a shot of decaf coffee for flavor.  We aren’t exactly sure what happened (perhaps the coffee shop had left the milk sitting out for a while in the heat?), but by the time we got home and tried to resume our very daunting task, I was too dizzy and nauseated to even stand up (way beyond my normal pregnancy symptoms).  My poor husband somehow managed to complete the whole rest of the ceiling while I was trying to get some rest.  I honestly do not know how he did it…it was really difficult with the two of us working on it!

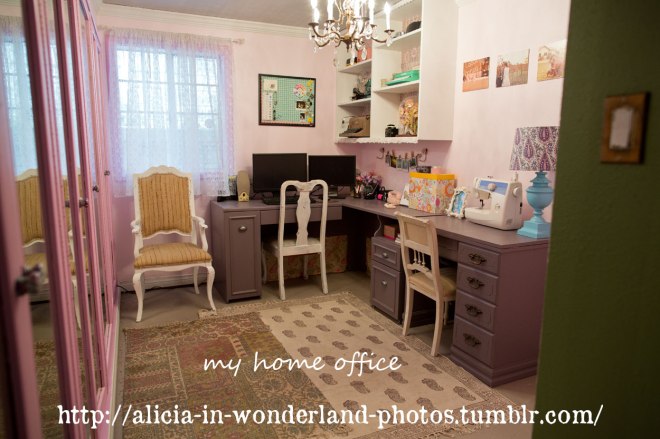
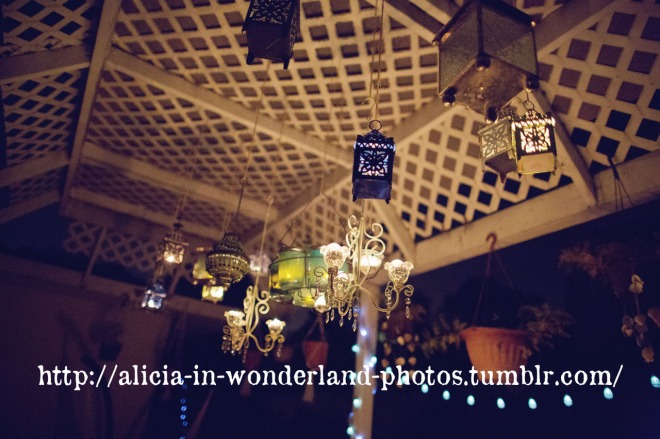
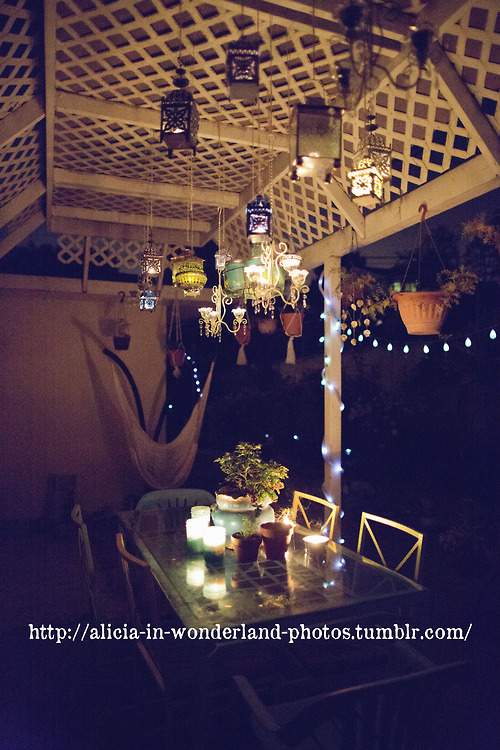
After all of the self-adhesive glue and wallpaper dried, he noticed that many of the edges near the seams did not stick to the ceiling.  He had to go through and do a second round of gluing with regular wallpaper paste (perhaps that would have been easier to use in the first place).  Finally, once he finished all of that, I painted the wallpaper with two coats of beautiful shiny, metallic silver paint from the Martha Stewart collection.  The whole project was a lot of work, but I am so happy with the end result. 🙂  Combined with my vintage chandelier (that we actually purchased for part of our wedding reception decor, seen here!), and the ceiling medallion around the chandelier, my office looks completely glam now!

The full unveiling of my new home office coming soon!

Easy DIY Project: Fabric Covered Custom Cabinet Knobs

I have been working on all of the finishing touches in my new home office, and I have not been able to find any knobs for all of my storage cabinets that I liked.  I have looked everywhere, and nothing seemed to be just right.  When I found a pile of fabric scraps in one of my drawers, I came up with the perfect solution!  I decided to take some plain knobs and decoupage them into knobs that coordinate perfectly with my new office decor. 🙂  I love the end result!  Here’s what I did:

1.  Found some plain, inexpensive knobs that were the right size.  I used pink ceramic knobs.

tumblr_mao142QhKG1qh2ttzo1_1280
2.  Covered a knob with a layer of decoupage glue (I used glossy Mod Podge).

tumblr_mao142QhKG1qh2ttzo2_1280
3.  Covered the knob with a scrap of fabric, and wrapped a tiny rubber band around the fabric to keep it in place.

tumblr_mao142QhKG1qh2ttzo3_1280
4.  Added an exterior coat of decoupage glue all over outside of fabric and let dry.  Repeated with a second coat after approximately 20 minutes.

tumblr_mao142QhKG1qh2ttzo4_1280
5.  Once all of the knobs were dry, I removed the rubber bands and trimmed off any excess fabric.

tumblr_mao142QhKG1qh2ttzo5_1280
6.  Attached knobs to my cabinets!

tumblr_mao142QhKG1qh2ttzo6_1280

More of the office decorating projects coming up, and the full unveiling of my new home office coming soon!

Easy DIY Project: Custom Fabric Covered Lamp Shade

 I had made another fabric covered lamp shade for my office previously at our old house, but that fabric does not match with my new office decor (perhaps I will use that lampshade in the upcoming nursery!).  I decided to start over again with a new plain lamp shade, and cover it with some fabric that better matches my new decorating design.  I used about a half yard of fabric, but your needs may vary based on the size of the lamp shade.  Here’s how I did it….

1.  Start with very plain lampshade.

tumblr_mao0n8gZwr1qh2ttzo1_1280
2.  Line up fabric so the pattern displays best across various areas, and pin in place with clothespins along top and bottom.  I covered half of the lamp shade at a time to make sure that the fabric pattern is evenly distributed.

tumblr_mao0n8gZwr1qh2ttzo2_1280
3.  Very carefully removed fabric from lamp shade, with clothespins still in place.

tumblr_mao0n8gZwr1qh2ttzo3_1280
4.  (not shown) Trimmed excess fabric in a line parallel to line created by clothespins, in order to allow for hem inside lampshade.
5.  Carefully ironed and steamed fabric along line created by clothespins, and folded under again from there, ironing and steaming again.  This creates a clean line on the inside of the shade, with no loose threads showing.  Once the lines were all pressed, I carefully used a few dots of craft glue to hold the raw edge of the fabric in place.

tumblr_mao0n8gZwr1qh2ttzo4_1280
6.  Next I placed the fabric back onto the lamp shade, and started carefully gluing it in place with a glue gun.  I started by placing a thin line of glue on the outside edges of the lamp, top and bottom.  Once those were in place, I glued the hemline to the inside of the lamp.  I made sure to work in small sections, and kept the fabric smooth and tight at all times.

tumblr_mao0n8gZwr1qh2ttzo5_1280
7.  To finish it off, I snipped a few areas of the hem where the metal structures of the lamp shade were preventing the fabric from lying flat.

tumblr_mao0n8gZwr1qh2ttzo6_1280
8.  I repeated the whole process with the other half of the lamp shade, and then it was ready to set up in my office!

tumblr_mao0n8gZwr1qh2ttzo7_1280

More of the office decorating projects coming up, and the full unveiling of my new home office coming soon!

Patio #1 Updates!

I have been quite busy lately reworking everything in the main patio.  We realized that it was poor planning on our part to mix in the dwarf fruit trees with the flowers in the planters for watering purposes, and that it would be better for both if they were segregated into their own areas.

Since the planters have two levels, there are a few distinct zones now.  The upper level was already primarily roses, and we are leaving it like that (I added in some more flowers between the roses).  The upper level in the area closest to the house was originally overrun with weeds and ivy when we moved in.  We found some roses on sale that were too good of a deal to pass up, and those are placed up there, waiting for us to be ready to plant them.

The lower level by the fire pit now has just the dwarf almond tree, one of our 3 dwarf lemon trees, and a dwarf kumquat tree.  There is also a straggler artichoke that is waiting to be relocated, but I need my husband’s help with removing a large stump in the flower bed area where the artichoke will find its new home. 🙂

The lower level closer to the house is now completely dedicated to flowers.  I dug up and divided some of the shasta daisies.  They don’t look all that great at the moment, but I am hoping that they will be hardy enough to recover being divided  and replanted at a less than ideal time of year (ideally this should be done in early spring, but that wasn’t really an option since we were busy closing escrow at that time!).

When I was reorganizing all of the planter beds, I realized that there were a lot of hidden plants from previous owners!  There were tons of tiny little begonias planted behind and under the shasta daisies, away from sight.  I also found an asparagus fern which was very sad and droopy in nearly full sun.  I relocated the begonias and fern to my partial shade garden in the front, and they are so much happier!  I also found a large spider plant, which I happily divided into plantings for tons of hanging planters around the pergola.  Nothing like finding free plants that you didn’t know that you had!

I also finished out my decorating plan for this space…the theme of this patio is Texas Bohemian!  It is really inspired by a lot of the amazing funky boutiques my husband has taken me to all over Texas.  We have two patios, and decided to go with a “his and hers” decorating style for them.  Since this is the patio where the barbeque is located, this is “his” patio.  I made sure I didn’t use any pink in the decorating here. 🙂  My patio will be a little different…post coming soon!

tumblr_m7f5v0OCDJ1qh2ttzo3_1280 tumblr_m7f5v0OCDJ1qh2ttzo2_1280 tumblr_m7f5v0OCDJ1qh2ttzo1_1280 tumblr_m7f5v0OCDJ1qh2ttzo7_1280 tumblr_m7f5v0OCDJ1qh2ttzo6_1280 tumblr_m7f5v0OCDJ1qh2ttzo5_1280 tumblr_m7f5v0OCDJ1qh2ttzo4_1280 tumblr_m5hn9kxBG21qh2ttzo10_r1_1280  tumblr_m5bbnkchRJ1qh2ttzo9_1280 tumblr_m5bbnkchRJ1qh2ttzo8_1280 tumblr_m5bbnkchRJ1qh2ttzo7_1280 tumblr_m5bbnkchRJ1qh2ttzo6_1280 tumblr_m5bbnkchRJ1qh2ttzo5_1280 tumblr_m5bbnkchRJ1qh2ttzo4_1280 tumblr_m5bbnkchRJ1qh2ttzo3_1280 tumblr_m5bbnkchRJ1qh2ttzo2_1280

tumblr_m5hn9kxBG21qh2ttzo6_1280 tumblr_m5hn9kxBG21qh2ttzo5_1280 tumblr_m5hn9kxBG21qh2ttzo4_1280  tumblr_m5hn9kxBG21qh2ttzo2_1280 tumblr_m5hn9kxBG21qh2ttzo1_500

What I Wore: Pink Shirtdress for Running Errands

My husband usually doesn’t get home early enough to get any quality “what I wore” pics for me during the week days, but there are always exceptions!  He happened to come home the other day just as I was about to leave to go run some errands, so he snapped a few quick pictures. 🙂

I happened to discover during the pictures that we were starting to get ripe blackberries.  He had already noticed this and had been snagging the ripe ones when he left in the morning, before I noticed them. 🙂

Dress:  vintage
Slip:  self-made
Scarf:  H&M
Necklace:  Forever 21
Belt:  Vintage
Bag:  Anthropologie
Shoes:  Anne Klein

tumblr_m6s7naes8W1qh2ttzo1_1280 tumblr_m6s7naes8W1qh2ttzo2_1280 tumblr_m6s7naes8W1qh2ttzo3_1280